Monday, 27 February 2012

It's Even in a Box Now!

Following on from my previous post; I've been busy boxing my DDS.


I bought a case from my local Maplin, it's the same case as my digital modes interface is boxed in from here:

http://g0mgx.blogspot.com/2011/10/how-come-its-siuch-damn-mess-again.html

I'm totally useless at cutting metal, so a plastic enclosure is the only real option if I want to do this myself, here is the front panel (with the display upside down) taking shape:


And placed into the outer frame:


Some clothes pegs hold it all together whilst the glue sets:


And here it is, finished:


Not bad, egh?

Sunday, 26 February 2012

DDS Running Well

Following on from my previous post I've been playing with the software for the DDS experiments I've been doing. The software is written in C and compiled in the Pinguino IDE and runs on the 4550 Pinguino board I made previously:

http://g0mgx.blogspot.com/2012/01/penguin-you-mean-penguino.html

Ed, EI9GQ, has been inspirational with this and other experiments of mine; his DDS VFO information can be found here:

http://homepage.eircom.net/~ei9gq/dds.html

I've posted a video on You Tube of the results of this recent experimentation here:


If anyone is interested, the source code for this DDS is here:

UPDATE 16/6/2012: I've re-written the code in Arduino (http://g0mgx.blogspot.co.uk/2012/06/its-been-ages.html):

http://www.qsl.net/g0mgx/files/G0MGX_DDS.ino

Fun, egh?

Wednesday, 22 February 2012

Progress is Fast and Furious!

After a bit of a false start with my latest DDS experiments, finally I have made a huge leap forward and made a pile of progress.

I was struggling to get the programming of this AD9851 to work successfully, but after resorting to reading the datasheet all became clear!

The AD9851 modeule is attached to my Pinguino board from my previous post:

http://g0mgx.blogspot.com/2012/01/so-hows-penguin.html

It's connected and setup in serial programming mode so there are actually only 3 connections plus ground between the DDS and the Pinguino PIC. 

The part I was struggling with was the on-board clocking of the AD9851. The older 9850 just runs and the clock speed you attach to it; however the 9851 has a 6X clock multiplier on-board. This small board has a 30MHz clock, so multiplied by 6 should be a clock speed of 180MHz; I wasn't seeing that. However, now I've cracked it and have it configured so that the clock is running at 180MHz.

So I've got the 4 line display running, I've got some test code that sets the DDS output at 5MHz and that's working fine. I know I can get the data entry keypad and the rotary encoder to work OK, so it's just the software now. I say just, hmmm, it may take me quite a while. But at least now I can write a bit of code and test it on this setup with confidence.

At last! It's so frustrating when you are playing with software and hardware - which do you blame. Nothing happening is rather hard to debug. At lest I now have a good solid starting point.

The only other thing I need to look into is the power supply to the AD9851. I've got it powered on the same +5V line as the PIC board, but it's running rather hot. But at least it's functional!

Pinguino rocks!

It's Made It!

Finally, the AD9851 board I have been waiting for has arrived from Hong Kong. It would have been quicker to go and fetch it, but it is here safe and sound.

As an aside, I was reading my March 2012 copy of QST (that's the ARRL monthly comic)

http://www.arrl.org/

and saw a great idea of using a web cam as a microscope. The basic idea seemed to be that you could use some PC based software and web cam combination to zoom in on small components (like SMT) to aid soldering and general visibility. Seemed a great idea to me so I bought a cheap webcam from eBay.

I've attached the cam to my main desk lamp and downloaded this software:

http://www.yawcam.com/

But the best I can manage is this picture of my new board:


I can see it better with just my eyes! So a little more investigation is needed at this end I think.

So, I'm off work next week so I will be trying to progress the DDS sweep generator I keep talking about....

Fun, egh?

Saturday, 11 February 2012

Four isn't quite the same as Two!

Firstly I have to report that my work is once again getting very badly in the way of my play time; there's not so much I can do about that if I want to continue to get paid. Therefore I shrug my solders and simply get on with it. Looks like I'm off to Abu Dhabi next weekend with my employer - I tend to travel a lot, but the United Arab Emirates for one day of work, even to me seems rather nuts.

So, in my last post I said that I wanted to use a 4-character display module for my latest DDS experiments; well this has kept me foxed for some time. It got so bad that I actually had to download the manufacturers data sheet and read it! Now that really is desperate!

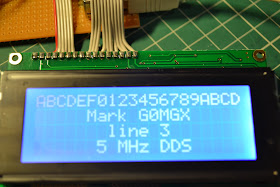
I've got the display working now, it looks rather nice, but as usual is close to impossible to photograph:

But as you can see; I have successfully written to all four lines of the display. As it transpires this LCD module requires exactly the same initialisation as a 2 line module; the trick is in finding the address of the start of each line. They actually wrap so that line 1 feeds onto line 3 and line 2 and 4 proved just impossible to find!

I ended up with commands in hex of 80, C0, 94 and D4 for the start of lines 1, 2, 3 and 4 respectively. All of the code I'm developing to talk to this display is still using the Pinguino board and IDE I made back here:

http://g0mgx.blogspot.com/2012/01/penguin-you-mean-penguino.html

I'm still waiting for my Hong-Kong sourced AD8951 DDS chip, so the actual DDS experiments themselves will have to wait. At least I have some confidence that I can write to my display module of choice!

Cat's not been helping much as usual:


Good though, egh?