Well,
Following from my musings last time on the BATC Portsdown project; I think mine is now up and running.
I've been working on a box for the project and the various bits and bobs are now inside:
So, following the suggested test setup I've configured the transmitter to TX on 1255 MHz using 2000KS (thats the symbol rate) and my newly invented DATV receiver from here sees this:
So I conclude it's working. Now to try and stream some video and then think about external amplifiers and filters!
I've decided to initially aim at 146.5Mhz in the NoV only allocation above 2M as my first target frequency.
I've set the Portsdown to tx on 146.5MHz, 7/8FEC with a symbol rate of 333KS. The output close up looks like this:
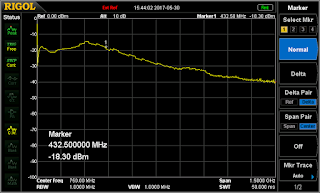
Checking on the harmonic content we see this:
So I made a LPF (needed!) and now the output looks like this:
In reality the LPF looks like this:
It is a standard 3 inductor design with 22pf at each "end" and 43pf in the middle two locations. The inductors are 3 turns open wound on a 6mm drill bit.
I've hooked up the BATC supplied EasyCap USB device to the Portsdown and I have coupled up my AntennaCam and we can see this on the MiniTiouner receiver we made here:
So, the next thing I need is a TestCard for TX; enter another great use of a Rasperry Pi. I've installed the software called TCANIM from here. I've followed the instructions to the letter but I cant seem to get a video signal out of the Pi AV socket....
Local conditions.


