
Well,
Following on from my great invention last time, I've been fiddling some more with the ADF5355 that we used here. This will generate RF from 54MHz all the way up to 13.6 GHz (which is simply amazing).
I've done something that feels a little silly, but is working:


Following on from my great invention last time, I've been fiddling some more with the ADF5355 that we used here. This will generate RF from 54MHz all the way up to 13.6 GHz (which is simply amazing).
I've done something that feels a little silly, but is working:
- I have developed some code for the MicroMite to do touch screen control
- That communicates over a serial connection with a SAMD21 ARM Cortex M0 which does the complex double precision maths needed for the ADF5355
It feels a little silly to be using two processors, but:
- The MicroMite doesnt support the double precision maths needed for the ADF5355
- I can't find an easy-to-use library to do the graphics and touch screen gubbins on the SAMD21
So we have two pieces of software.
The ADF5355 board is from Amazon and looks like this:

You can get one here.
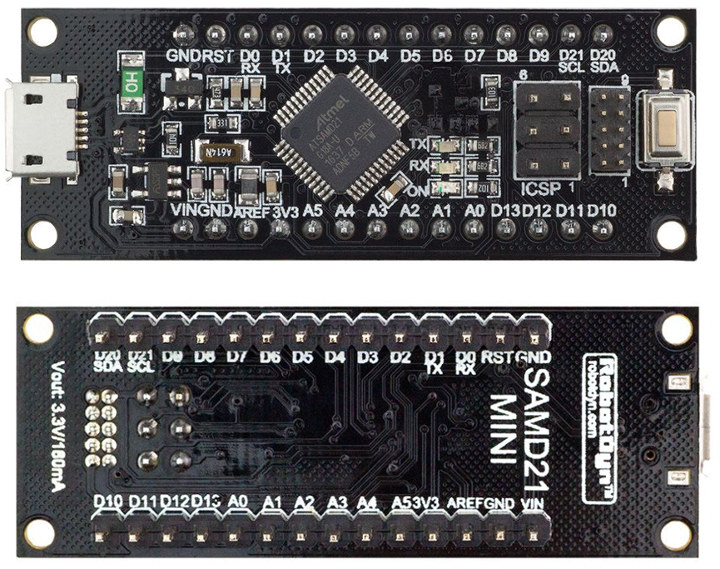
If you want to play along at home, I have also developed a macro based excel sheet using VBA to do the maths here; that will calculate the register values for a given target frequency. Once you have those, you could use my simple code to send the register values to the board over SPI. I've used a Arduino Zero clone, which you can get here. We need double precision floating point maths for this job.
This board is supported by the Arduino IDE as-is and looks like this:

The connector labeled ICSP is used for the SPI comms.
Once you understand all that gubbins, you could start to play further. Here's how I've got the bits and bobs hooked up:

The touch screen in the LCD BackPack provides the facility to view the current selected frequency:
The ADF5355 board is from Amazon and looks like this:
You can get one here.
If you want to play along at home, I have also developed a macro based excel sheet using VBA to do the maths here; that will calculate the register values for a given target frequency. Once you have those, you could use my simple code to send the register values to the board over SPI. I've used a Arduino Zero clone, which you can get here. We need double precision floating point maths for this job.
This board is supported by the Arduino IDE as-is and looks like this:
The connector labeled ICSP is used for the SPI comms.
Once you understand all that gubbins, you could start to play further. Here's how I've got the bits and bobs hooked up:

The touch screen in the LCD BackPack provides the facility to view the current selected frequency:

and enter a new one:

Once you have entered the required frequency the MicroMite sends the selected frequency as a string to the SAMD21 processor which then does the necessary maths to generate the 13 register values used by the ADF5355 and squirts them over the SPI interface.
The ADF5355 uses a 100 MHz clock which is generated using the ADF4351 from last time which in turn is clocked by the shack 10MHz frequency reference.
The initialisation of the ADF4351 is done by the MicroMite over SPI, the SPI to the ADF5355 is from the SAMD21 processor.
The ADF5355 uses a 100 MHz clock which is generated using the ADF4351 from last time which in turn is clocked by the shack 10MHz frequency reference.
The initialisation of the ADF4351 is done by the MicroMite over SPI, the SPI to the ADF5355 is from the SAMD21 processor.
Here is an example of the 13 register values being sent:

and a close up of one of them:

This will need boxing and turning into bench test gear.
I did quite a bit of reading up on the Arduino SPI library during this project; if you are interested in programming the ADF5355, please pay attention to the SPI library calls in this code as good practise.
I did quite a bit of reading up on the Arduino SPI library during this project; if you are interested in programming the ADF5355, please pay attention to the SPI library calls in this code as good practise.
The Basic code that runs on the MicroMite is here and the code for the SAMD21 (using the Arduino IDE) is here.
I've done a video of all this:
I've done a video of all this:
Here is the very lovely Miss Luna Cat who has assisted throughout:

No comments:
Post a Comment